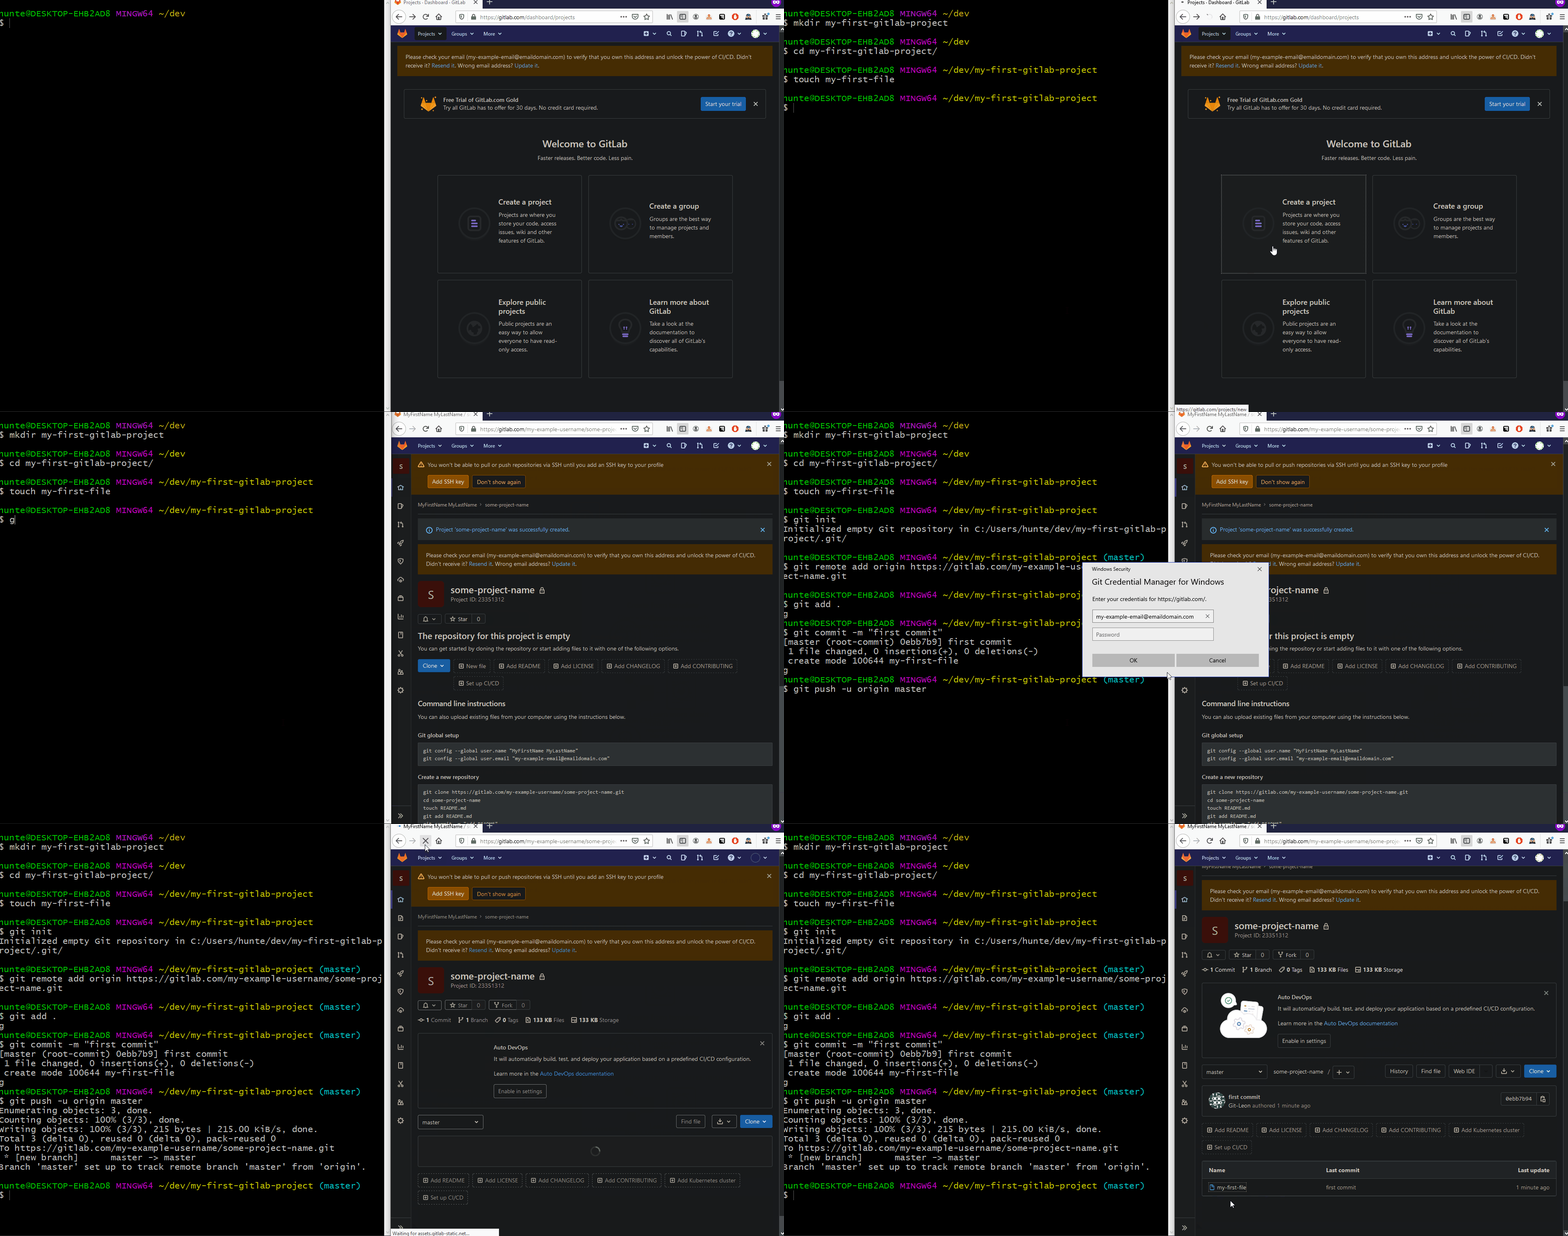
Creating a Repository
Create a Remote Repository
- Navigate to
https://gitlab.com/projects/new
- click
Create Blank Project button
Creating a Local Repository and Pushing to Remote Repository
- Navigate to the root folder of the project you would like to become a repository.
git init
- this generates a
.git folder in this directory.
- the
.git tells this directory that it is a git-repository, enabling subsequent git commands in this directory.
git add .
- adds all changes in this directory to the repository
- this modifies the contents of the aforementioned
.git folder
git commit -m 'my update message'
- commits these changes to be pushed onto the web
- this modifies the contents of the aforementioned
.git folder
git push -u origin master
- pushes the committed changes onto the web, making them accessible through the web.
- the local
.git is compared to the remote .git, and respective changes are written as a new commit

Cloning a Preexisting Project
- From a browser, navigate to the URL of the GitHub repository you would like to clone.
- Copy the URL of the repository your clipoboard.
- From a terminal, do the following:
- Create a
dev directory in your home directory.
- Change directories to
~/dev
- Clone project into
~/dev directory and alias project directory as my-project
git clone {repository_url} my-project
Adding Changes to Preexisting Git Repository
- navigate to the root directory of the project on your local machine
- add changes
- commit change
git commit -m 'update message'
- push changes to web
git push -u origin master
- Refresh the webpage to ensure your changes are visible.
Pulling Changes from Remote Repository to Local Repository
- If there are changes on your remote repository that are not on your local repository, you can execute the command below to fetch the changes.
